Links to files on the current site
Home
Syllabus
Lab methods
Assignments
Supplemental pdfs
|
Preparing and interpreting Gram stains
Nearly every attempt at identifying an unknown bacterial culture begins with a Gram stain. We start there because the Gram stain differentiates nearly all isolates into one of two major groups, namely Gram-positive or Gram-negative (a small proportion of species stain unpredictably or not at all). Species with a single plasma membrane surrounded by a thick peptidoglycan cell wall stain positive and species with a thin peptidoglycan wall sandwiched between two lipid membranes stain negative.
We start by preparing a smear on a clean microscope slide, then we heat-fix the cells to the surface and follow with the staining procedure. The objective is to obtain a single layer of cells so that all cells are exposed to the staining reagents.
Preparing a smear
Here is a description of our procedure, to be accompanied by a video demonstration.
- If water tends to bead up on your slides you may need to clean them before starting. One way to clean a slide is to repeatedly breathe on it, followed by rubbing
with a Kimwipe or paper towel to remove the fog. When the slide de-fogs immediately after breathing
on it, it is sufficiently clean.
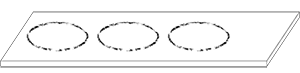
- Use a glass etching tool to mark one or more dime-sized circles on the surface of a slide, leaving room on one end for handling the slide.
- To prepare a smear from a colony, place a loopful (~25 µl) of deionized water over the circled
area.
- Use a loop or stick to aseptically remove a barely visible amount of material from a culture and stir it into the drop. Try to disperse the culture material completely, so that there are no visible chunks of material, and spread the liquid into a thin layer within the circle. The water should be slightly turbid.
- Allow the drop to air dry completely (usually a couple of minutes for a single loopful).
- Hold one end of the slide horizontally with a clothes pin and pass it through a flame three times with the smears up. Each smear should pass through the hottest part of the flame (see the third note below) and each pass through the flame should take about a second.
- Let the slide cool for 30 sec or so before starting the staining procedure.
NOTES
- Heating the slide briefly partially melts the cell walls, causing the cells to adhere to the glass surface.
- Make sure that the liquid is completely dry before passing the slide through the flame.
- To obtain a sufficiently hot flame, adjust the air-gas mixture so that the gas burns with a pale blue flame (inner cone) with a nearly colorless large outer cone. The hottest part of the flame is just above the tip of the inner cone.
- To prepare a smear from a broth culture, instead of carrying out steps 2 and 3, aseptically remove several loopfuls of culture and spread over the circled area.
Expect the smear to be far less dense than smears prepared from colonies on agar.
- Sometimes bacteria grown on agar plates adhere strongly to each other andor the agar, making the material very difficult to disperse. With practice, even these "difficult" cultures can be stained and observed.
Gram stain procedure
Gram stain reagents will stain skin and clothing. Gloves, laboratory safety glasses, and a lab coat are recommended. Details vary from one Gram stain protocol to another, mainly in the timing and the composition of the decolorizing agent.
Components
Here are our formulas for Gram stain reagents. These solutions will be provided ready made.
- Gram crystal violet: 1% aqueous crystal violet dye OR Hucker's crystal violet: 2 g crystal violet 90% dye content,
20 ml ethyl alcohol, 0.8 g ammonium oxalate, 80 ml distilled water
- Gram iodine: 1 g iodine, 2 g potassium iodide, 300 ml distilled water; iodide is dissolved first, then the iodine, and the solution is kept protected from light
- Gram safranin: 4 g safranin powder, 200 ml ahydrous ethanol, 800 ml distilled water; safranin is dissolved in ethanol, then water added
- Gram decolorizer: 25% acetone, 75% isopropyl alcohol
Procedure
Again, a video demonstration is planned to accompany the steps listed below.
- Place the slide with smear(s)s up on a rack in a staining tray. Flood the slide with Gram crystal violet so that all of the smears are covered completely; to be sure, you might flood the entire slide from edge to edge
- After 60 sec pick up the slide using the clothes pin and rinse the entire slide with deionized water; make sure you have not trapped stain underneath the clothes pin where you have grabbed the slide. Note that the smears will be stained a bright blue.
- Flood the slide with Gram iodine, leave for 60 sec., then rinse again with water
- Use a gentle stream from a pasteur pipet to rinse the smears with Gram decolorizer. Color should come off at first. Continue rinsing until the wash is colorless,
then rinse again with water.
- Flood the slide with Gram safranin for 60 sec. followed again by a water rinse
- Gently blot the smear to remove excess water and allow to air dry; do not wipe the smears or you may wipe them off
NOTES
- Following step 2, all smears should be stained a bright blue
- Following step 3, all smears should have turned nearly black; if not, then the iodine may have gone bad or you applied it to the wrong side of the slide
- The iodide in Gram iodine forms a complex with the crystal violet that is retained by Gram positive cell types following the decolorizing step
- Complete step 4 in as short a time as possible (within 15 seconds); color will come off of all cells, even Gram positive cells, if the decolorizer is left on too long
- Don't be disappointed if the smear becomes invisible after decolorizing; a Gram negative culture is expected to be colorless until it is counterstained with Gram safranin
- Gram positve cells will stain purple and Gram negative cells will stain pink
- Observe the smears in a microscope before recording the Gram stain result; do not rely solely on the color of the smear itself
Observing a Gram stain
A video to accompany this part is in preparation.
We employ bright field microscopy for observing Gram stains. These steps are for your reference only. You will definitely need hands-on training to learn to observe bacteria in a light microscope.
- Double check that the side of the slide with the smear on the surface is facing the objective lens;if the slide is upside down, you won't be able to focus at high magnification
- Start with low power (40x final magnification), find an area of the smear with a single, moderately dense layer of cells, focus, and then work up in magnification
- Move up to 100x, focus and center, then move to 400x and again, focus and center the specimen
- Rotate the 400x objective away from the specimen, place a generous drop of immersion oil directly on the lit part of the smear, and rotate the oil immersion lens into place
- Focus and observe the color and characteristics of the cells
NOTES
- If you aren't sure which side of the slide bears the smear, either feel for the scratch that you made with the etching tool, scrape over the smear with a loop or stick, or use the microscope at low magnification to check whether or not the cellular material is on the same surface as the scratch that you made
- Bacteria often dry down in concentric rings; if you have trouble finding the bacteria look for the rings, which are usually more densely populated than the rest of the smear, around the edges
- At low magnification Gram stained material looks like dirt on the slide; you need to go up to at least 100x and frequently to 400x in order to distinguish the cellular material
- Even at 400x magnification, neither color nor shape nor size of cells can be reliably observed; or example, with typical resolution of ~1 µm, two cells of < 1 µm diameter lying next to each other will look like one cell.
- As you work up in magnification, record how you got there, including in what direction you needed to turn the focus knob when you went from 100x to 400x and from 400x to 1000x; knowing which way to focus saves you a lot of time later
- After putting immersion oil on a slide, the high dry (40x) lens can't
be used again unless the oil is removed; we remove the oil by gently blotting it off onto a paper towel
Interpreting a Gram stain
Here some information that we seek when observing a Gram stain.
- Is the isolate Gram positive or Gram negative?
- Do we have a pure isolate?
- What is the typical cell morphology, including size?
- How are the cells arranged?
Gram Positive or Gram negative?
Purple staining indicates a Gram positive reaction and pink indicates Gram negative. However, Gram positive cells may stain Gram negative if they are older or were overexposed to decolorizing agent. If you have mixed purple and pink staining cells that are otherwise indistinguishable, then you likely have a Gram positive isolate.
Assessing purity
We likely have a pure isolate if the cells all share the same shape, size, and Gram stain reaction (+ or -). We frequently see variation, though. In a pure culture of rods or cocci the cells typically have the same diameter, but rods usually vary in length. Numbers of cells in chains or clusters will usually vary. If you see two or more distinct types of cells then you may have a mixed culture. For example, a pure culture is unlikely to have cells with two different diameters or both rods and cocci. However, irregular species may have both. For some Gram positive species, what looks like a mix of rods and cocci or coccoid cells is actually a mix of rods and spores.
Describe the cell morphology and arrangement
Below are examples of cell types we are likely to find among our unknowns and how the cells might be arranged. The cells of most isolates will look very similar when grown on different media. We will, however, encounter pleiomorphic species, for which the cells may develop different shapes, sizes, and arrangements depending on the growth medium. If you think you have found a pleiomorphic species, double check on fresh media to ensure that you are looking at the same isolate on two different media, and not two different isolates.


|
